












1


記録者
強化

[ Unique / Initiation ]
カード発動時、
そのカードの
コストに応じて
時間記録1
時間超越排除時、
時間記録3

作者: batchll2943先週に編集


Clear Creep, Prevent Clog Hand
(Note: Apologies, the mention of the Mutation effect earlier was incorrect!)
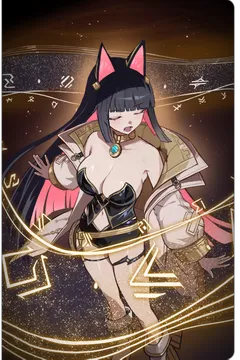
TLDR: This comp leverages Chrono Circle card-draw and the Chronicle passive to let Rita consistently play 3 TAC cards for 0 AP every turn. This deals ~30k free total DMG to clear creeps, prevents hand clogging, and carries hard counters against anti-heal mechanics (Nebula 1) and dangerous glass-cannon mobs (FS 141–145).
I've tested and verified it can 150 TS, Nebula 9/9 (2 Boss), Basin 26/26.
My Combatant's Stat and MF:
Rita: 969 ATK, 64.3+20 Critchance (MF), 188.2% Critdmg (Line of Justice + CritDMG)
Rossweisse: 1100 ATK, 45.1+16 Critchance (MF), 201.4% Critdmg (Veiled Radiance + ATK)
Tiphera: 468 DEF, 851 HP, 11 Ego Recovery (Glory's Reign + DEF)
Minimum Requirements: Rita E0, Tiphera E0, Rossweisse E2 (Maximum Bind Buff)
By leveraging the card draw from the Chrono Circle upgrade, and the Chronicle passive, you can consistently maintain 3 TAC cards and 6 CAs in hand (with the correct combo)—allowing you to play those 3 TAC cards for zero AP.
With this build, Rita deals an average of 30k total DMG across her 3 TAC cards, which efficiently clears creeps and prevents hand clogging, as she draws her entire deck at the start of the turn.
Once setup is complete, you’ll start your turn holding 4 cards (3 TAC + 1 FD if E2). Combined with the standard 5-card draw at the start of the turn, your hand reaches 9 cards. Finally, Flicker Blade move to hand and split into 2, pushing your total to 11 cards (exceeding the 10-card hand limit)—yet surprisingly, the Light and Dark Card isn't discarded (funny moment).
Why is this important? Take Boss Nebula 1 as an example: you will be afflicted with a debuff called Necrosis, which causes you to lose HP whenever you play a Heal card, with the damage ramping up over time. Because of this, Rita (sub-DPS) essentially becomes the main DPS for this team, as Rossweisse gets clogged with Tiphera's Heal cards and can't deliver the finishing blow.
Additionally, on floors 141–145 of FS, you will encounter a mob named Vine Lord, which has low AC but deals massive DMG (due to the Vulnerable debuff applied by the previous wave). In this situation, Rita will always have 3 TAC cards (correct combo last turn) ready in hand to shred the enemy's HP, allowing Rossweisse to easily finish it off (ego skill/...).
Tip: You can use Flicker Blade (Amped) instead of Flicker Blade (Unbound) for better Rotation
Quantum Seed II (Select): I chose this Epiphany because I wanted the flexibility to adapt on the fly depending on the situation. Crucially, you won't have to worry about deck bloat, as all of Rita's and Rossweisse's cards will have already been used. You can use Quantum Seed (Draw)
Dual Creation V: A bit of a gamble, huh? High risk, high reward. You can use Epiphany 2 or 4.
Set up Turn:
1) Use All the Upgrade card (Rita First )
リタ2) Use all Rossweisse's card (except Blade of the Cycle and Light/Dark Card)
ロスヴァイセ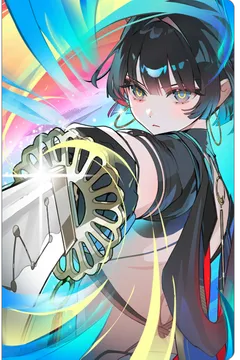
3) Use Quantum Seed and Blade of the Cycle: For the first Quantum Seed, choose □, then use the generated □ card in your hand to draw the remaining □ card. For the second Quantum Seed, choose ○, use the generated ○ card in hand (activate Blade of the Cycle right after using it), and use the generated □ card to draw the remaining ○ card. At this point, if you have E2 Tiphera, you will get the (□○□) card combo. For the remaining two Quantum Seeds, choose △ or ○ as you like.
ティペラ
Combat Turn:
1) Use all Rita's Card

2) Use all Rossweisse's card (except Blade of the Cycle and Light/Dark Card)
ロスヴァイセ3) Use Quantum Seed and Blade of the Cycle: For the first Quantum Seed, choose □, then use the generated □ card in your hand to draw the remaining □ card. For the second Quantum Seed, choose ○, use the generated ○ card in hand (activate Blade of the Cycle right after using it), and use the generated □ card to draw the remaining ○ card. At this point, if you have E2 Tiphera, you will get the (□○□) card combo. For the remaining two Quantum Seeds, choose △ or ○ as you need.
ティペラVideo: https://youtu.be/nqo2SYWFypo
会話に参加するにはサインインしてください。




Why not morale rita tac?