














2


공명하는 불꽃
강화

[ Unique / Initiation ]
푸른 화염 2장 생성
턴 시작 시 푸른 화염 2장 생성, 1턴간 다음 발동하는 결속 카드의 비용 1 감소

작성자: Adhanak4시간 전 수정됨


Updated Haru deck with Season 5 data and a better "Owen"
As for most of the decks I try to craft, the main goal is to have a comfy and fun deck that can reliably execute its planned combo while having decent sustain. It is by no means optimized to deal the most damage / one shot bosses.
Most equipments and refinements are suggestions. Some explanations and alternatives can be found in the "Details" section of this guide.
Abc -> Combattant
Abc -> Card
Abc -> Mechanic
Abc / Abc / Abc -> Equipment
[Abc] -> Memory fragment set
Continuing with the Season 5 deck updates, but this time we're also changing the team lineup. Sorry Owen, but Blazebell is just too good of a match for this team to not use her.
Haru also gets an update since the Memory: Loss card can be activated by Blazebell and boosts her damage even more (she also greatly benefits from the Season 5 equipments).
For Adelheid, the biggest change is that she now needs to carry both copies of Forbidden: Gesture of Freedom to let her teammates equip Memory cards. Since Blazebell can also generate AP, Truth Behind a Story is added back and the cost-reduction divines on Protect Us are removed to free some Faint Memory (which I honestly haven't found a perfect use for yet). The game plan is mostly unchanged though the setup can be slightly more chaotic (though surprisingly easier to pull off). There are a lot of possible changes that can make this deck crazier (in a good sense), but they usually require some rare divine epiphanies so I opted for simpler to obtain decks (and this is more than enough for all content in the game anyways).
Thanks to the Initiation tag, the starting hand will always consist of these 5 cards:
Start by playing Resonating Flame. You'll either want to play the generated Blue Flame or wait until it merges into a Fluttering Embers as the goal is to only have 0-cost cards left in hand to guarantee the cost reduction effects will fall onto the Anchors.
Play the first Once Upon A Time to target Haru's Anchor Shot (granting it and its future copies Blessing), then play both Forbidden: Gesture of Freedoms to reduce its cost to 0 permanently (as well as the copies it will create).


Next, use a second Once Upon A Time to get Anchor Pointer (the one with a divine draw) that you can then play to give the Anchors Retrieve.

In a perfect world, you would draw into Protect Us (or other draw cards to get Protect Us at some point), allowing you the optimal start. If not, you can restart the fight (if you care about min-maxing) or simply have an incomplete first turn.
In the perfect scenario, play Protect Us which will immediately draw the second Protect Us which you will probably want to play to be able to activate the Purity effects of Blazebell's cards.

Now we start copying the Anchors. Play the first Anchor Shot which will come back to hand (with Retrieve) and draw the copied Anchor thanks to the effect of Protect Us. Play that new Anchor (which also has Retrieve) to get the third one which you can then play.
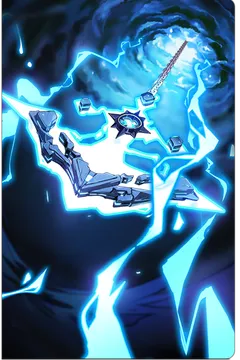
The rest will depend on the cards you draw and mostly follows the normal turn guide: play the Anchor Shots if they have Retrieve or Anchor Pointer if they don't.
The normal turns are pretty trivial as you want to play cards in the same order every time:
하루Celestial Bulwark is the prefered Chaos to farm Haru's equipment.
Weapon
There is no required weapon for this build to work.
Criticism of Discord (Senectus drop) is the best option for Haru. If lucky, you may get a Dagger That Tricked the Shadow from a Sekred Elite fight as an alternative. If not, RFS-17 will work as well (since all Anchors will be 0-cost). Last option is a simple Obsidian Sword.
Armor
There is no required armor for this build to work.
Crown of Corruption is the best option, with Fairy King's Crown being an alternative if it happens to drop from a Sekred Elite. All other options are pretty useless unfortunately, so get anything that can help with survivability if you don't get these options and do not want to farm more.
Accessory
There is no required accessory for this build to work.
Split Design Core is fantastic and is usually quite easy to obtain. If you fail to get it, Eye of the Punisher can work if you don't have another unique equipment, or a simple Amorphous Cube (though not ideal).
This version of Anchor Shot is needed to enable the "15 per turn" strategy. The Vulnerable divine epiphany is also highly recommended to maximize Haru's damage (you could technically use the Fortitude decrease divine epiphany as well if you can get it, though I haven't done any calculations to know which one is better).
Similarly, this version of Anchor Pointer is the only one that will apply to all Anchor Shots in the deck.

The first version of Charge Energy is used to boost Haru's CRIT Rate, but pretty much all version can be used. With this version, the draw divine epiphany is added to this card rather than a second Anchor Pointer for consistancy (i.e add draw effects to cards that you want to play early in the combo rather than late).
The version with draw can be used if you have trouble cycling your deck, while the upgrade version can be used for a simple "set and forget" option (although less powerful).

The effect of Lift Anchor only applies once for each Anchor, so it can be omitted from the deck for an easier cycling (it also makes it easier to target the correct card during copy events).

This card will be activated by Blazebell and provides both attack and damage buffs for Haru. There is no reason to use any other version (though this may be updated depending on Dahlia's card).

This card is used to enable some Memory Fragment effects for Haru, but it can be removed to allow for an extra draw divine epiphany for easier cycling.
 아스테리아
Even with the cost reduction on the Anchors, Asteria can still work as she targets cards with a "base" cost of 2 or higher. As Haru's signature partner, she is the best for personal damage.
 스칼렛
Scarlet can be a good alternative if you have her, as you will often be spamming Haru's cards one after the other.
 릴리안
Lillian is the best F2P option although her passive isn't that incredible (+80% Damage Amount at max copies). Her not being available in the shop also makes it harder to obtain her.
블레이즈벨Celestial Bulwark is the prefered Chaos to farm Blazebell's equipment.
Weapon
There is no required weapon for this build to work.
While Runnic Hammer does not benefit Haru, it is still a recommended pick for Blazebell to make her deck as generic as possible (to make it easier to swap teams). There also aren't any other good options, so you can pick Crimson Sword or a simple Flashbang for utility as alternatives.
Armor
There is no required armor for this build to work.
Pick whatever helps with survivability. This team already has both shields and heals so most options won't really have any impact.
Accessory
The Final Command is the whole reason we want to run Celestial Bulwark for Blazebell's deck. If you do not want to farm for it, you can run any Chaos with some decent supportive equipments (usually Swamp of Judgement to get Clover of the Forest).

We keep Blazebell's basic skills as they are part of her main stacking mechanic. This also leaves more Faint Memory to use (though we barely have any good use for it).

Unfortunately, the buffing version of Fluttering Embers only stacks turns so there isn't a reason to have more than one in the deck. We also generate more than enough AP so the base version of the card with a Morale common epiphany is pretty much the best we can use.

The base version of this card already provides all the effects we need and allows for a common draw epiphany. The Upgrade version "can" be considered, but it can mess with the first turn setup (since we cannot guarantee the starting hand with more than 5 Initiation cards).

Freyjaen Blessing already has a good base effect, allowing for some decent Neutral epiphanies for more draw or Morale. The Unique version has the highest Blue Flame generation if you need them to reach specific breakpoints.
Similarly, Resonating Flame can also be used with its base version for some more Morale. The version that generates 2 Blue Flames per turn has the highest yield and can be useful to play Celestial Wrath (generated from Enveloping Light), while the Exhaust version can be great to make the setup turn more consistant while freeing an Initiation slot (or you could even add an Initiation divine epiphany on that version for a guaranteed first turn combo).

Even more buffs because why not. If you happen to have Blazebell's signature partner as well as her E1, this card will pay for itself.

Blazebell has so much Faint Memory available and doesn't need much for some already great card options. As such, we are left with enough to add whatever Neutral cards can bring the most utility. In this case, Gear Bag is usually perfect, though First Aid Kit can also be considered for more Morale.
 비비안
Vivian is honestly quite insane and will further boost Haru's damage and CRIT Rate while also improving the effect of Vestige of Flames.
 닉스
Nyx is still great for any Controller combatant.
 아르웬
 알리사
Other options are honestly not that useful apart from the raw stats, so pick whatever you have.
아델하이트Laboratory 0 is recommended for Adelheid's equipments, but any Chaos with the Forbidden Catalyst can work.
Weapon
There is no required weapon for this build to work.
Tentacles of a Ruined Age (Senectus drop) is the best weapon to support the team damage. If you don't manage to get it, Crimson Sword can help to have a source of Agony (for specific buffs), or simply a Flashbang.
Armor
There is no required armor for this build to work.
Regenerative Ribcage is one of the best armors you can get in order to increase Adelheid's shield cap. Contaminated Helmet also works well if you are running City of Mist and happen to find it. Any other option that helps with survivability can be used as last resort.
Accessory
There is no required accessory for this build to work.
Superconductive Protein can be an interesting option depending on which Initiation cards are kept for Blazebell. Source of the Forbidden can also bring some utility when enemies try to chip at your massive shield. Administrator ID Badge may help in the event the enemy somehow breaks your shield (or for early turns).
The second key piece of our combo which guarantees the starting hand, allows us to pick any card we want and gives it Blessing.
For anyone degenerate enough to experiment, you can change one of the copies into another version to increase the amount of Blessing cards. The discard version lets you specifically target Haru's cards, while the X-cost version can also help with draw (but only twice). For these alternatives, you can also add an Initiation divine epiphany.
This card allows for targeted draw, making the combo a lot more consistant since only Haru's cards should have Blessing. A cost-reduction divine epiphany can be added but usually isn't needed considering Blazebell's AP generation. I instead opted for EGO skill cost decrease to make it easier to setup some specific effects / get some extra draw earlier.
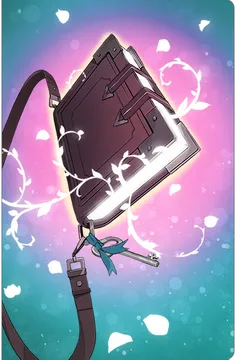
One more damage buff for the Anchors (and an initial stack of Vulnerable). If you struggle with deck cycling, this card can be removed.

Garden of Secrets brings extra sustain and being an upgrade card it won't impact your draw after being played. There is little reason to remove it unless you want to fully maximize your chances of a perfect first turn setup.
Adelheid has both Forbidden cards in order to allow the other combatants to run Season 5 Memory cards. While the event to copy this card during a Chaos run is quite rare, it can easily be duplicated after the run with a single core.
Most other Haru decks use Narja to discount the Anchors every turn. This allows for three Memory cards but has more chances of bricking during the combo. I personally prefer this version as it is simpler to use (even if the power ceiling is slightly lower).
 클라라
Clara is Adelheid's signature partner, and more importantly her friend. She brings a bit of healing (in case the shield isn't enough), some team-wide buffs and some extra draw with her EGO skill.
 레이첼
As the F2P option, Rachel still brings some draw with her EGO skill and can allow Adelheid to gain some stacks of Counterattack (though RNG) for extra damage.
Full Scale Offensive:
Spiral Tower of Screams:
The first version was already a powerhouse for the Tower, Blazebell simply adds more buffs AND more sustain.
Personal deck score (1=bad, 5=good)
Deck obtention: 4 -> Adelheid requires a Forbidden card, which can be annoying to farm for in addition to specific equipment. The other two use Season 5 decks which are currently the easiest to farm for.
Ease of use: 4 -> This new version is even easier to use than the first one. The only caveat is the draw capabilities depending on which additional cards are kept in the deck.
Power: 5 -> Easily reaching 200k per turn (which is my goal for these simple decks), I'm honestly more than satisfied with this deck.
Sustain: 5 -> Adelheid was alredy a good sustain, so guess what happens when you add a healer on top? Unless you let the enemies buff themselves on purpose, there shouldn't be a single situation where this team will die.
Total: 18/20
아직 댓글이 없습니다. 첫 의견을 남겨보세요.
대화에 참여하려면 로그인하세요.